Using the Profile II
May 5-9, S&P500 (ES)

Another look at using the market profile as a powerful tool. This is at the core of my daily planning and identifying levels - in this lesson we will zoom into specific clues in the profile that are guaranteed to inform our trading to favorable outcomes.
Image 1. It’s practically biology
The Market Profile
For those of you not familiar with the market profile, I highly recommend the gold standard study guide from CBOT. Yep, you can find it for free at that link, no sign-up necessary.
In last week’s lesson we opened the profile series, at the request of long-time subscribers. We are now on the second installment - using the profile for context and trading,
I end all of my lessons by repeating that simplicity leads to success. This is true of the most skilled traders - sticking to a system leads to the most consistent results, and with discipline they can become profitable. While most of my lessons are geared towards understanding the tape and the aggregate information it contains within the footprint, I always stress that context is king: most of these tools are at less effective - or at worst, useless - without a thesis.
While we often get lost in the minutiae of order flow, none of that really appeals to less stressful trading without understanding the overall picture. So:
Zoom out.
Zoom out.
Zoom out.
And for that I fundamentally refer all my trades to the market profile. Let’s look at last week’s profiles and the tradeable clues within.
I use Sierra Chart below. And this is the default for my trading platform. However many other services and software have volume profile and time price opportunity studies. If you have any questions or even tips for other followers, leave them in the comments below.
Image 2. ES market daily market profiles and major clues (May 5-9)
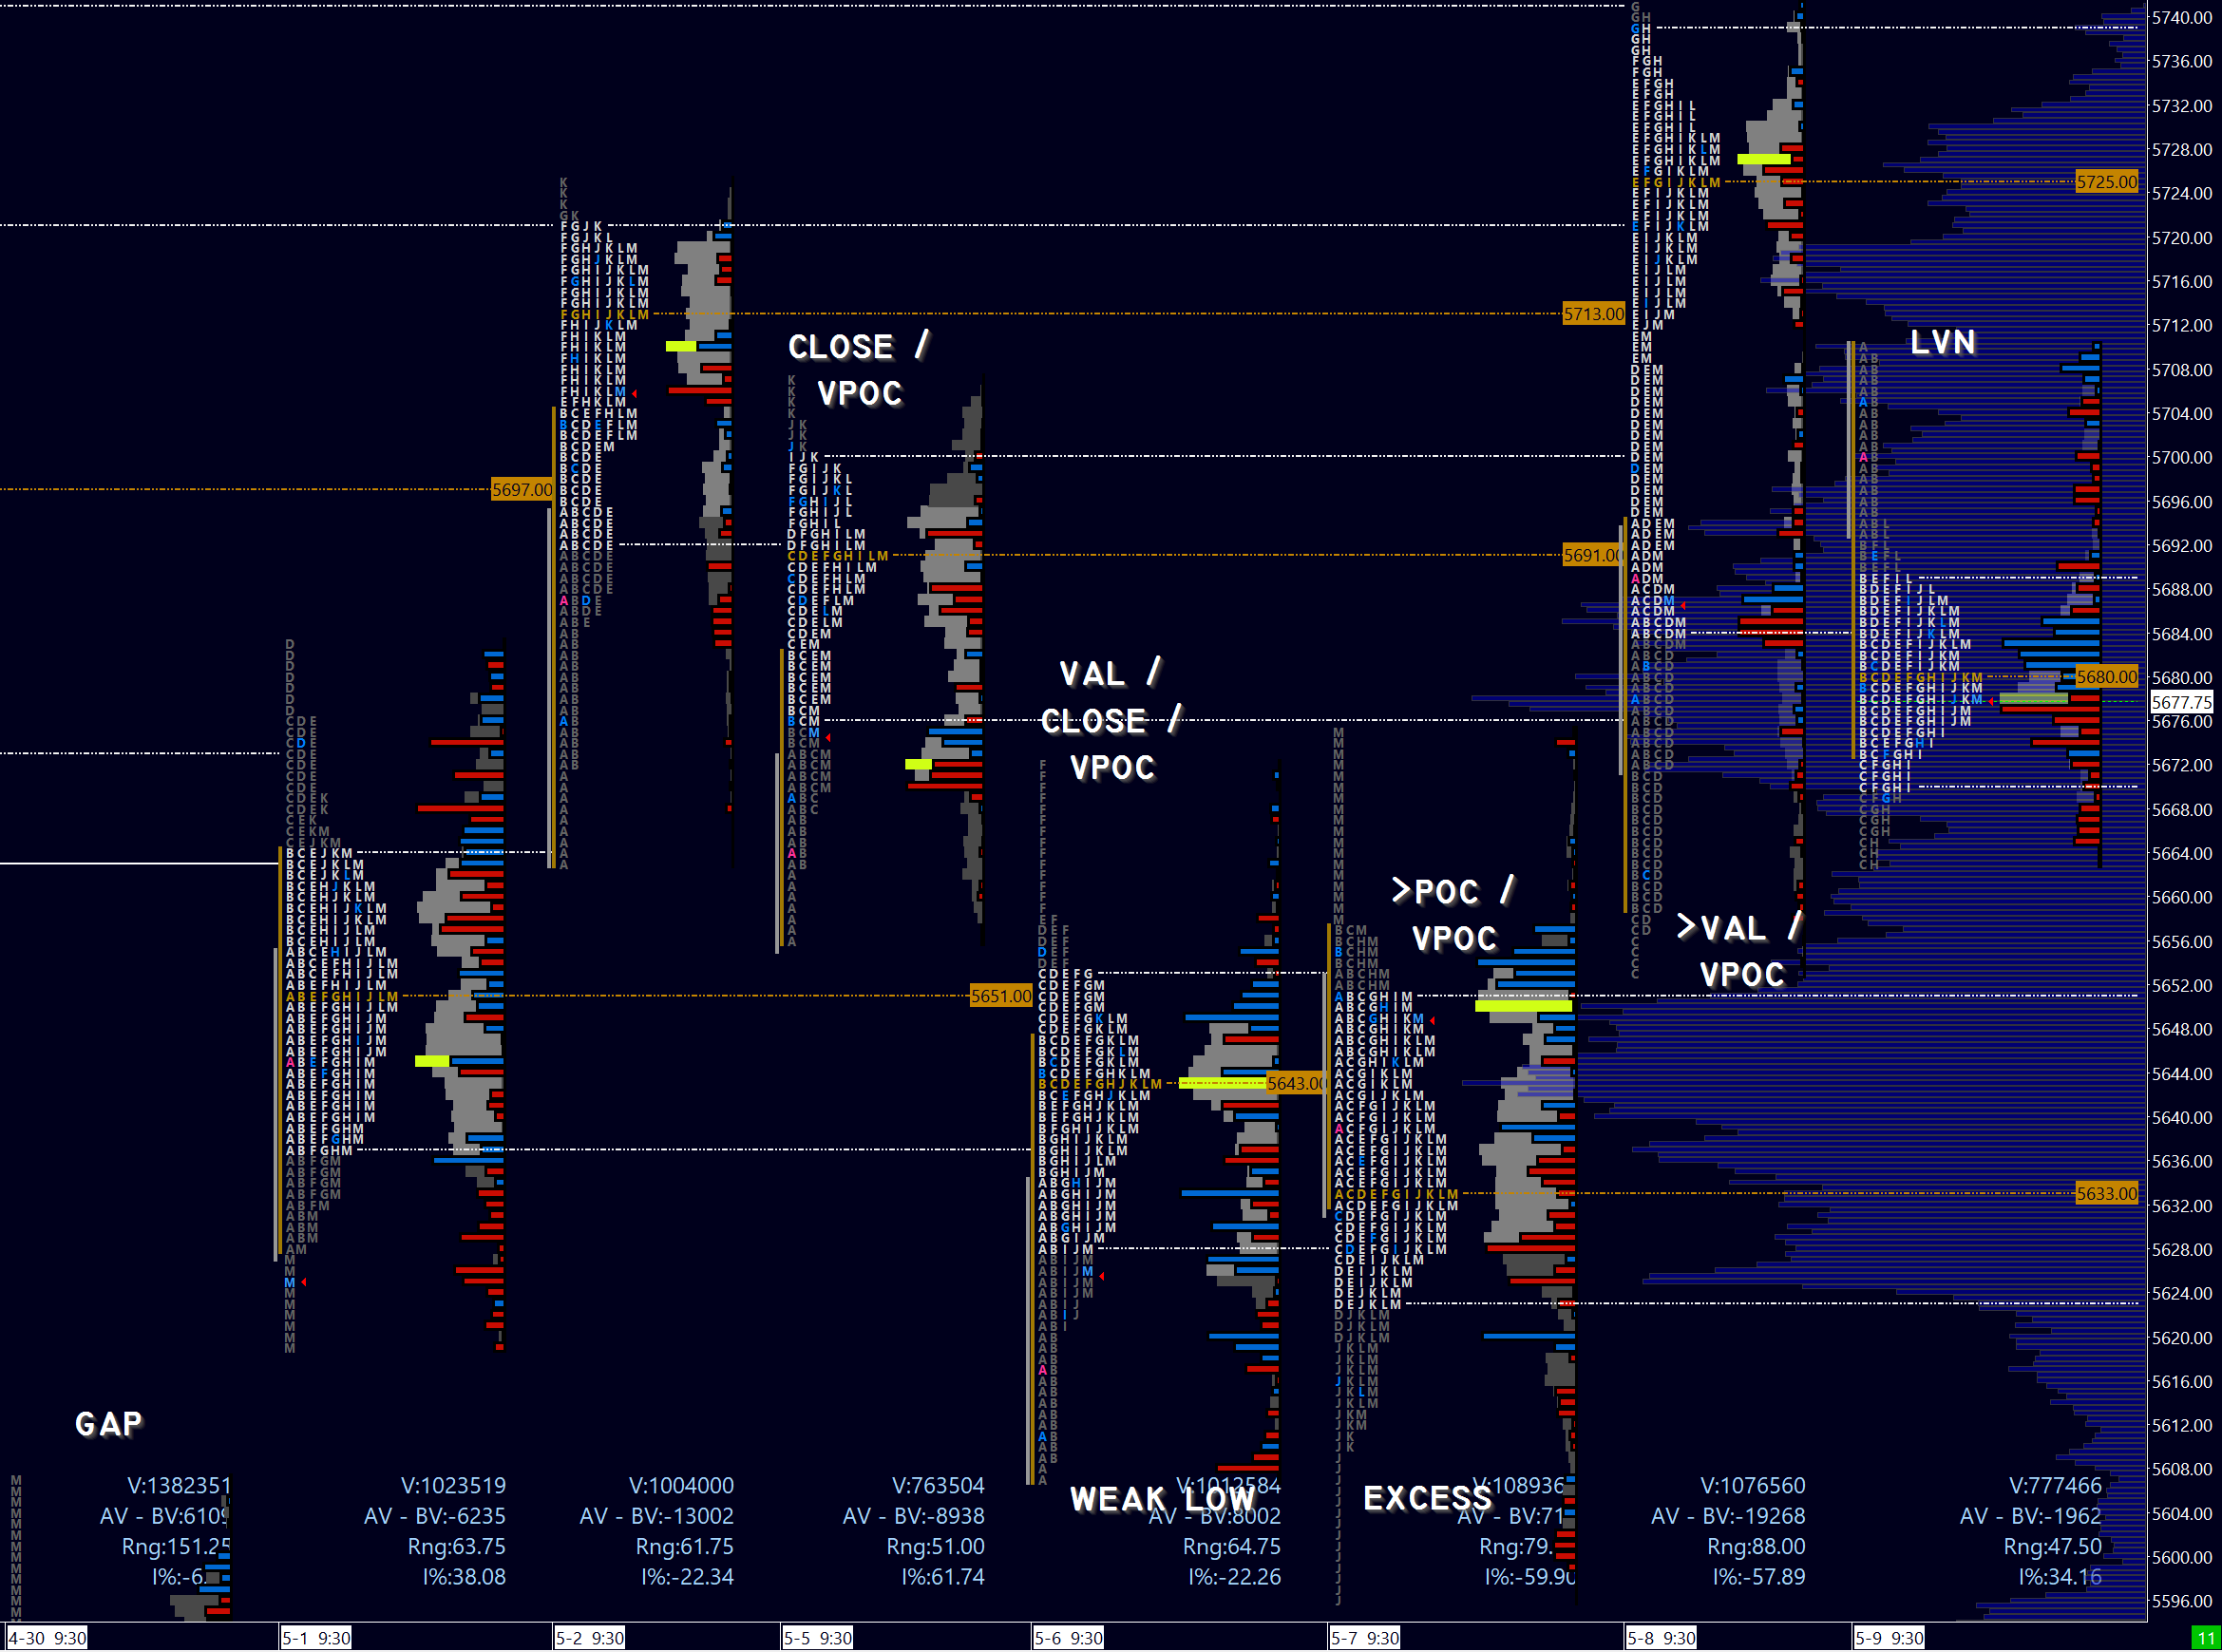
Click to expand the image, however I will be sharing more callouts below. I identified key clues from this profile above, and we will proceed in order from the beginning of the week, expanding each day’s profile to reveal the highest probability trades. Knowing when to trade is just as important as knowing when not to trade, and I argue that the latter matters more, especially at first.
The profile is great for this. I generally avoid tight balance, as well as a lack of a definitive area to lean on, like a low volume node (we’ll get to that), or a value area high (we’ll get to that, too). These two bits of information indeed gave some of the cleanest trades this past week.
Monday, May 5: see the expanded profile and context clues below.
Image 3. Prior week and Monday profiles. Monday is expanded
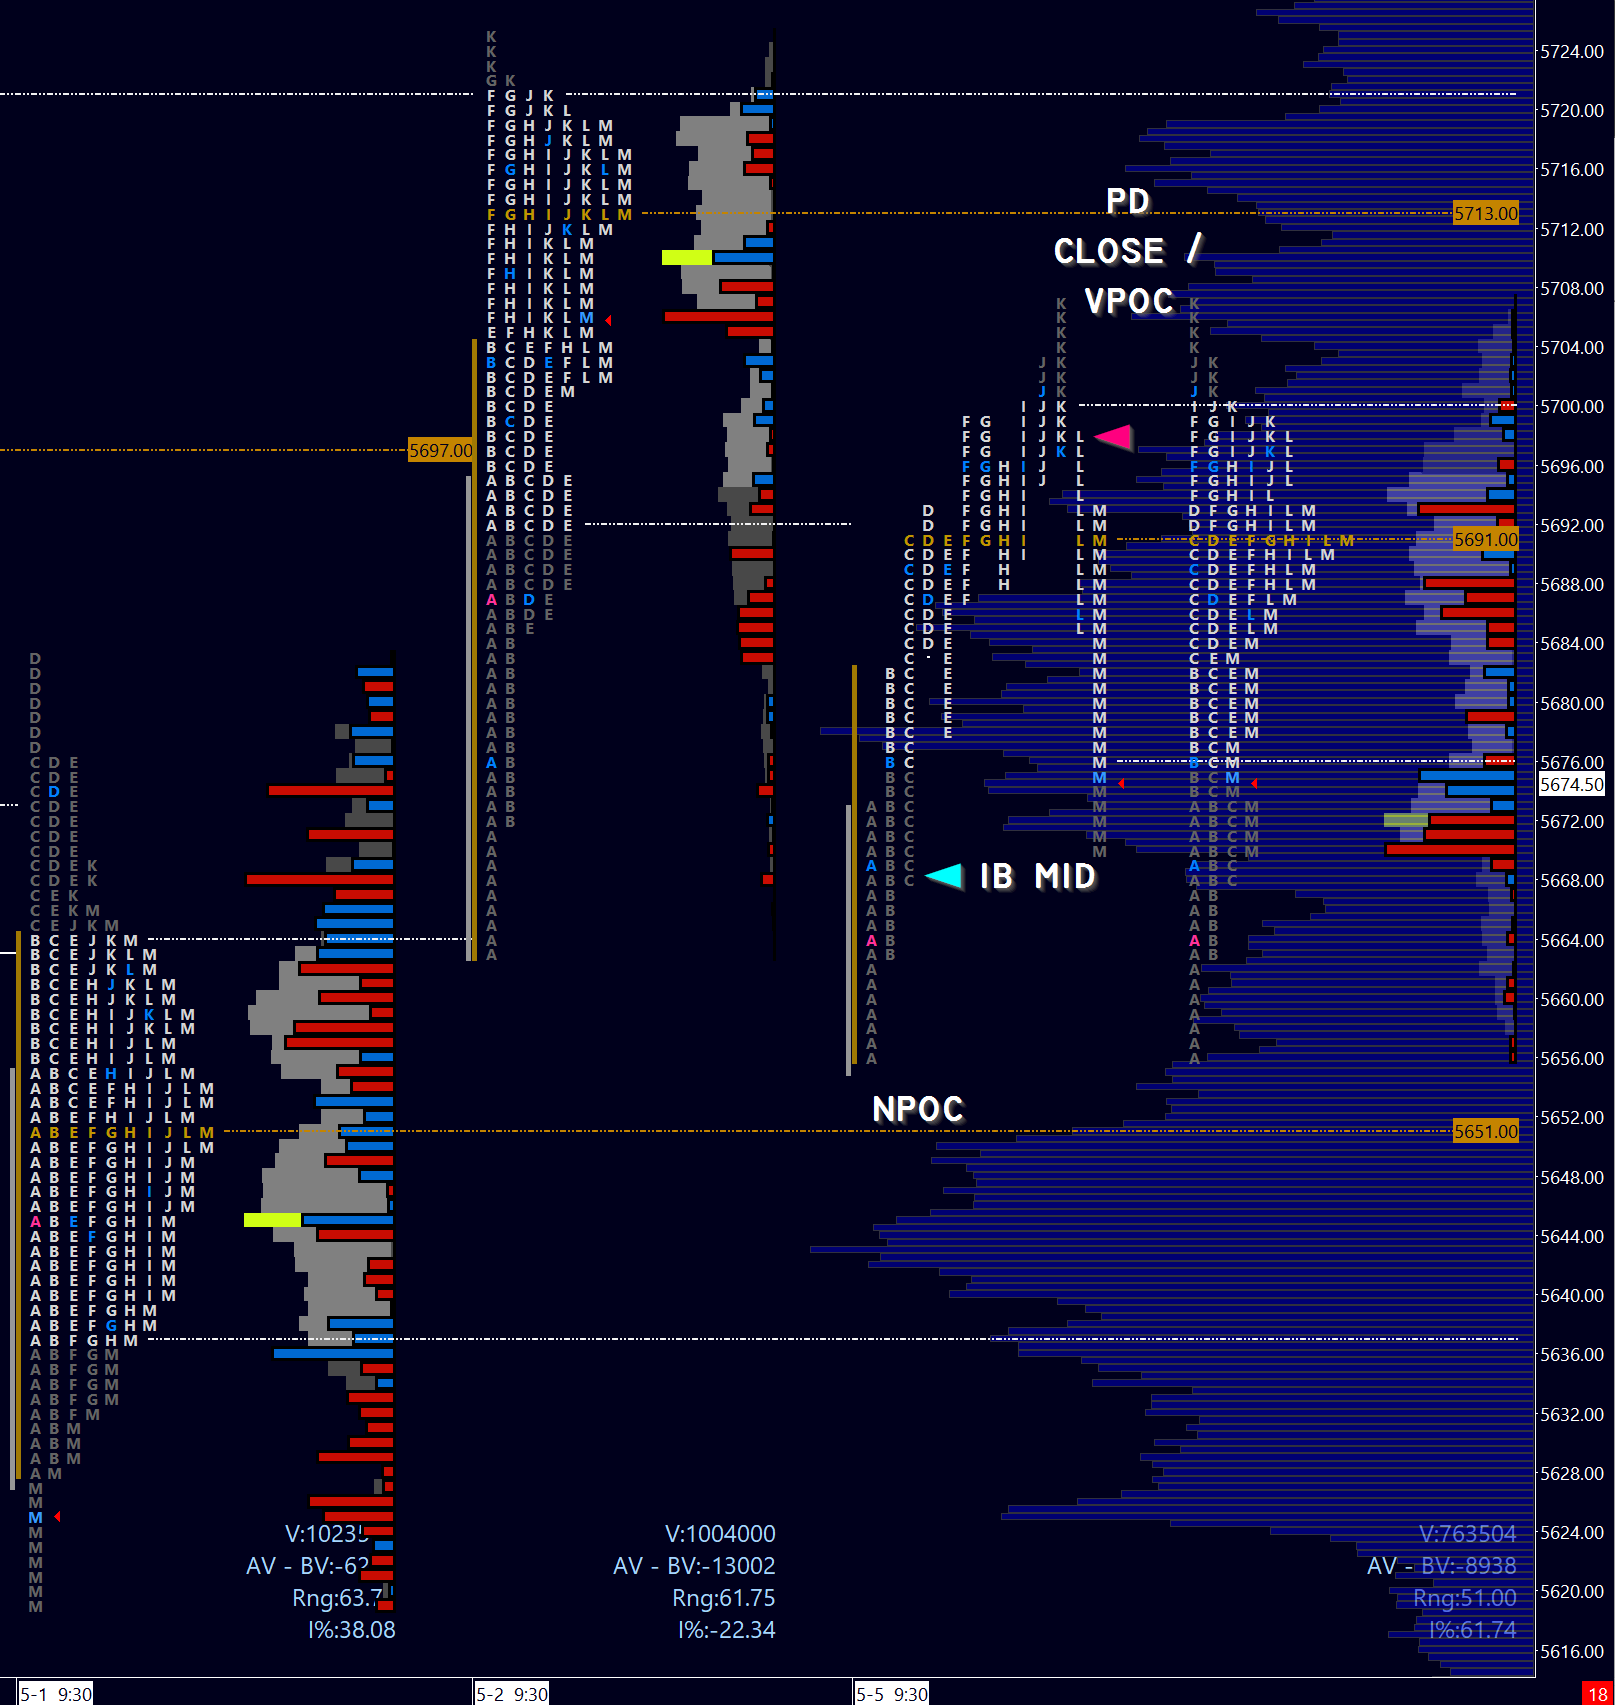
We opened below Friday’s value area, but sellers would need to spend time below the prior day low (PDL) to attract further downside. The open sees a dip in Thursday’s naked point of control (NPOC), which I was waiting to engage for a possible long. However this did not come, but the B period held Thursday’s value area high (VAH). This tips favor to the buyers.
The C period opened and dipped into the initial balance (6o minutes) mid, or IBM, which was the spot I anticipated for a possible long, with a stop below Thursday’s VAH which was already tested. My targets were Friday’s open, value area low (VAL), NPOC, and prior day high (PDH).
This turned out to be a clean trade despite not all targets reached. Once the prior day close (PDC) was rejected in the K period, with no VPOC let alone NPOC in sight, the buyers seemed done. I closed my remaining position at the L period failure to sustain above the K period close - which also could have been a great short into the end of day (or even next day!) following the weakness at the day’s high.
Let’s see how that short turned out, since we took some off at the close.
Image 4. Don’t listen to your bird brain

Tuesday, May 6: that short was a hell of a trade as we gap opened nearly 60 points lower!
Image 5. Daily profiles, Tuesday expanded.
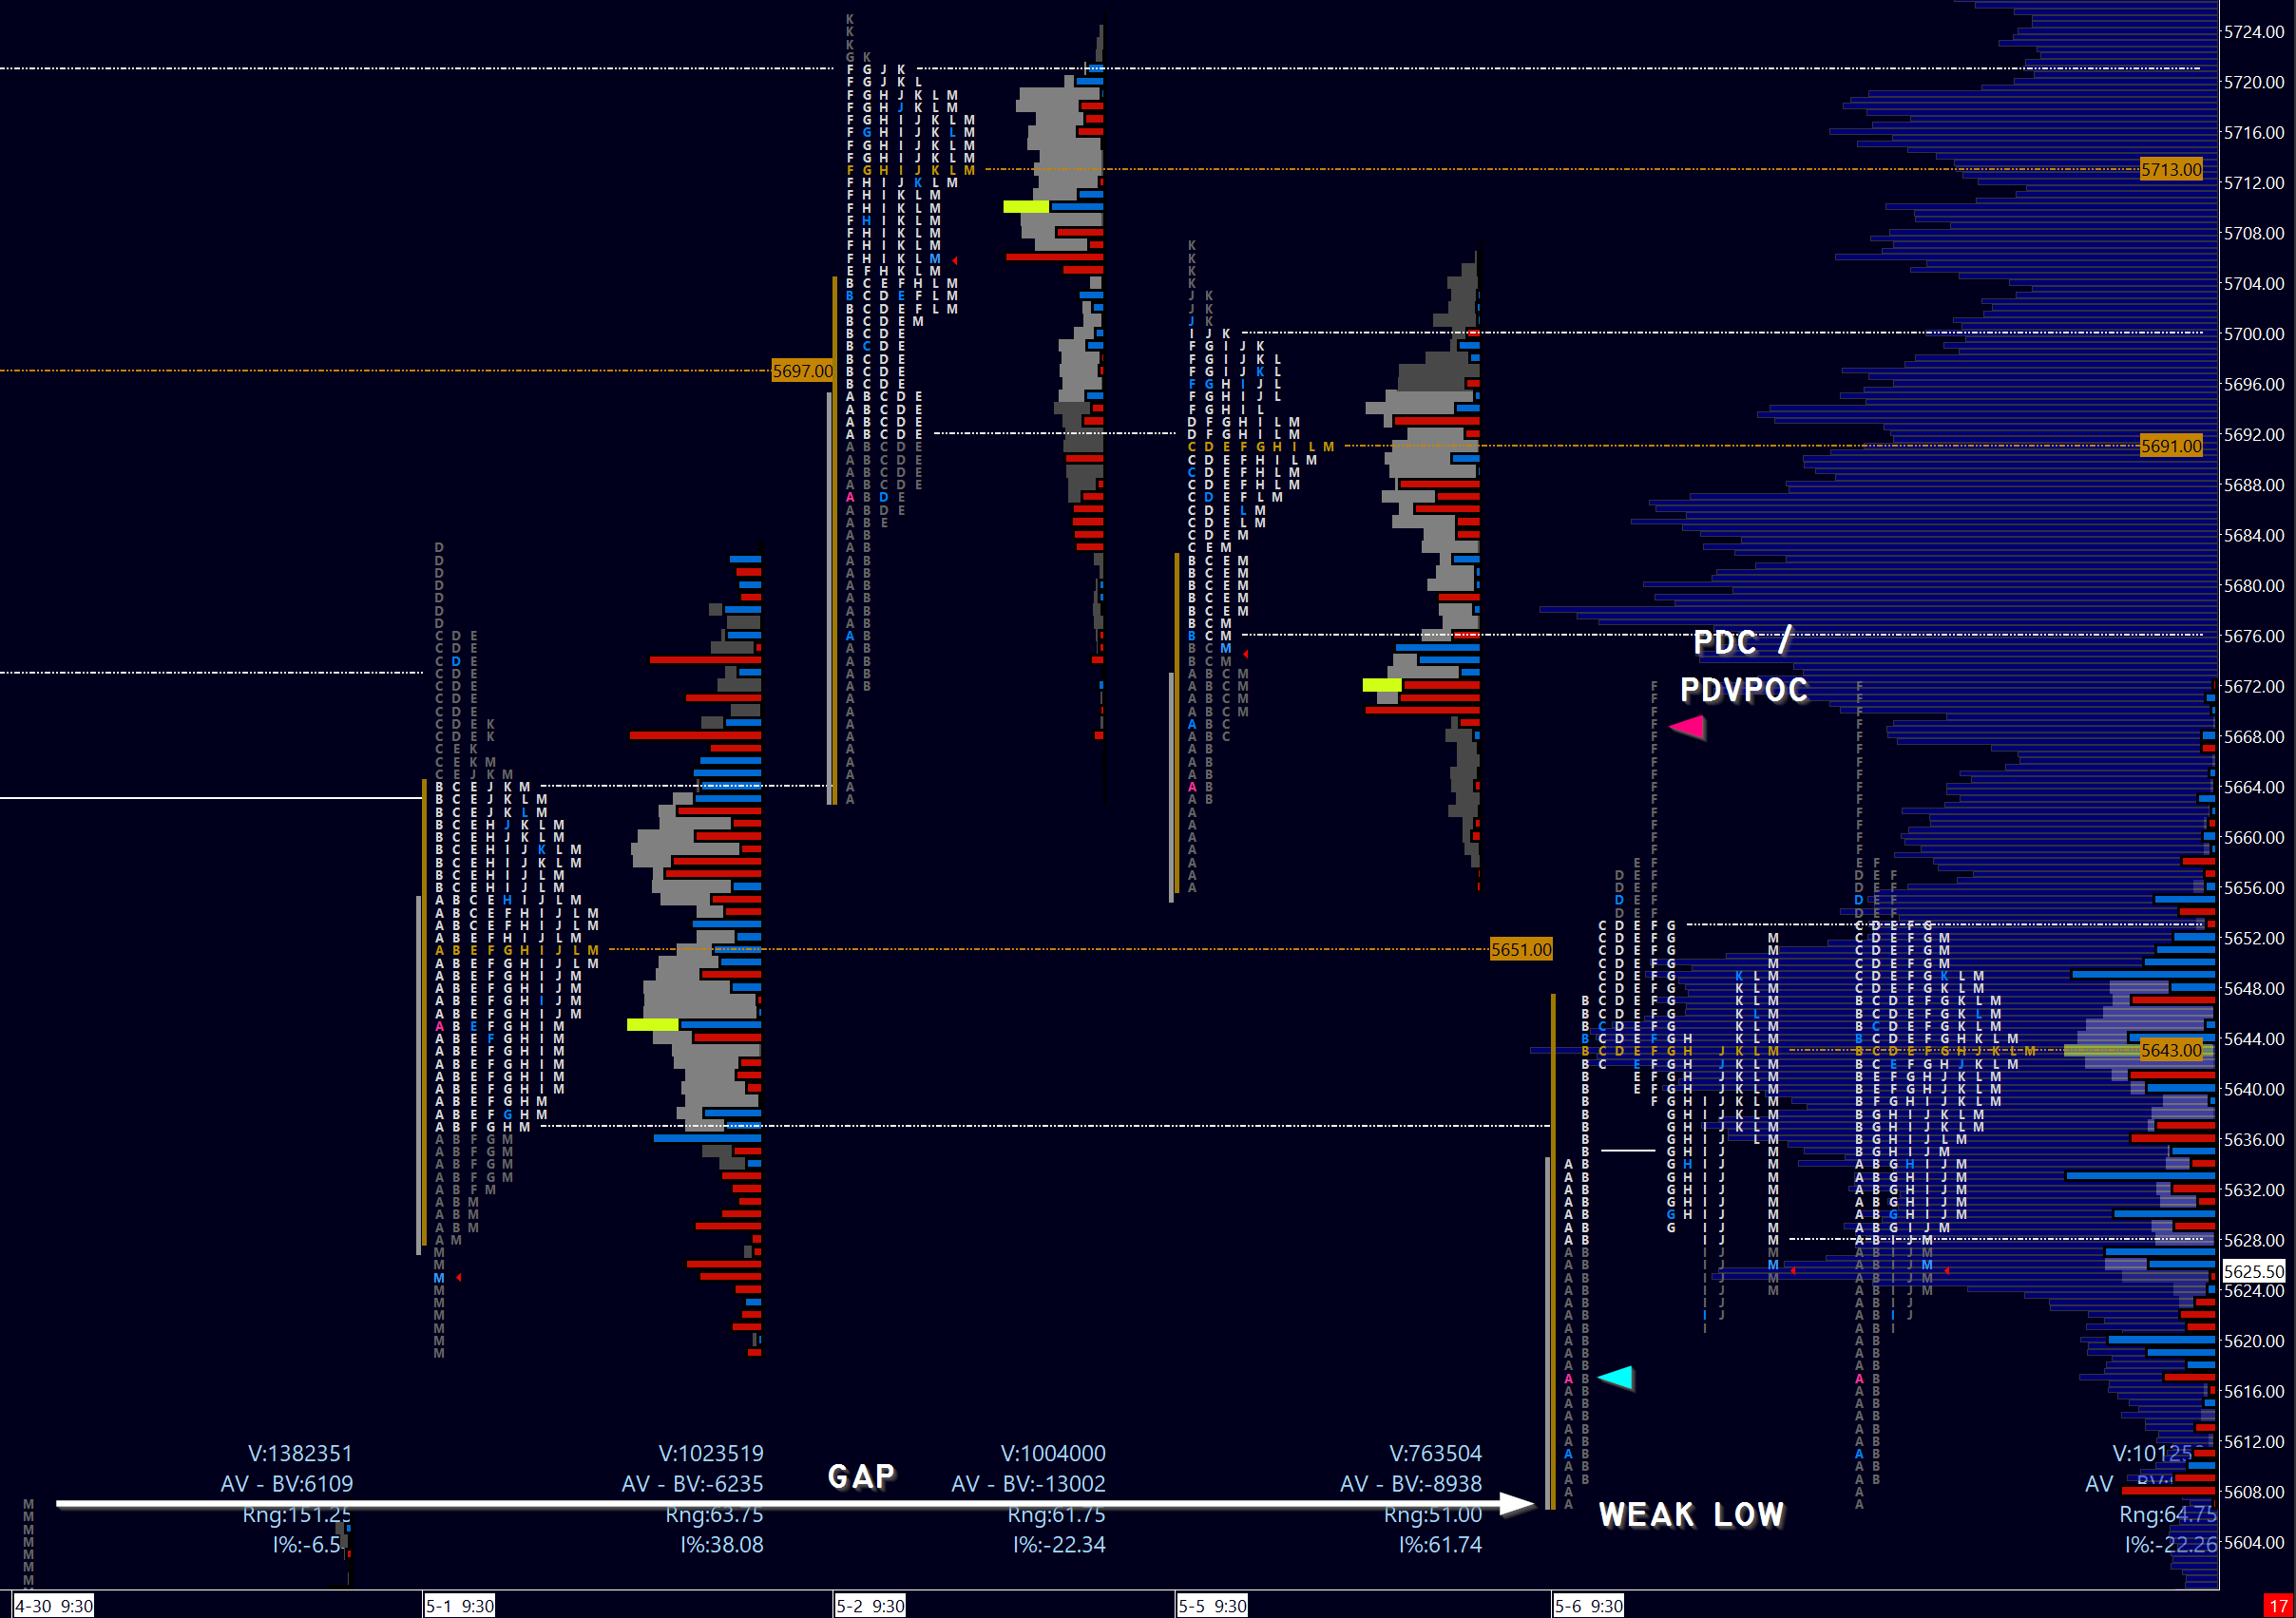
There was a lesson here for keeping runners, even in the overnight session (using a stop, of course).
Image 6. Don’t listen to your bird brain, Part II. Trading like a pro