
Trading Course: Setup Examples I
"Look Below/Above and Fail"
Every few weeks I share primers on strategies and concepts that contributed to the success of my trading system. Over the course of nearly two decades, these have became the backbone for my toolkit and understanding of the market. I evolved from losses, to breakeven, to a margin of profitability as I incorporated and refined these methods into a systematic and disciplined practice of trading. No amount of indicators or trading advice can substitute for those two fundamental cornerstones of trading. In fact too much information is likely to be detrimental, distracting you from developing focus and self-understanding, thus preventing real progress.
I will regularly share examples of key setups I use in trading. These are key conditions that must be met to define an entry and a stop, repeatable throughout different market conditions and products.
The goal is to make efficient use of your mental capital, create readily-recognizable trade conditions, and finally to make sure you have dry powder (real capital) to trade when profitable setups do materialize! To reduce noise and the impulse to trade every small move, these setups are designed to focus your attention to the highest return on low risk trades. The big bucks! These are, but not limited to:
Look above (or below) and fail. Also known as a failed breakout/breakdown, fakeout;
Mid-afternoon dip (or pop), a form of a retest;
Late-day fade, a form of exhaustion or reversal.
Each of these has further technical conditions that need to be met for the best possible risk to return ratio. The examples presented below are geared to familiarize you with interpreting the footprint (using Sierra Charts but any software will do) and auction process. Feel free to ask questions in the comments below and I will do my best to help you on your journey. Remember, there is no sliver bullet in trading! None. (unless you are a member of the US Congress…) So let’s dive in.
I. Look Below and Fail, September 28
In this failed seller initiation below major level 4300, sellers were effectively absorbed at this level during the ETH session on multiple retests. This was already a sign of weakness, as the low volume environment during ETH is more likely to see support or resistance yield on determined buying or selling. An attempt to push below was quickly absorbed by eager buyers. Two issues here for the sellers were a) lack of volume at open; and b) no momentum and hesitation at the key level.
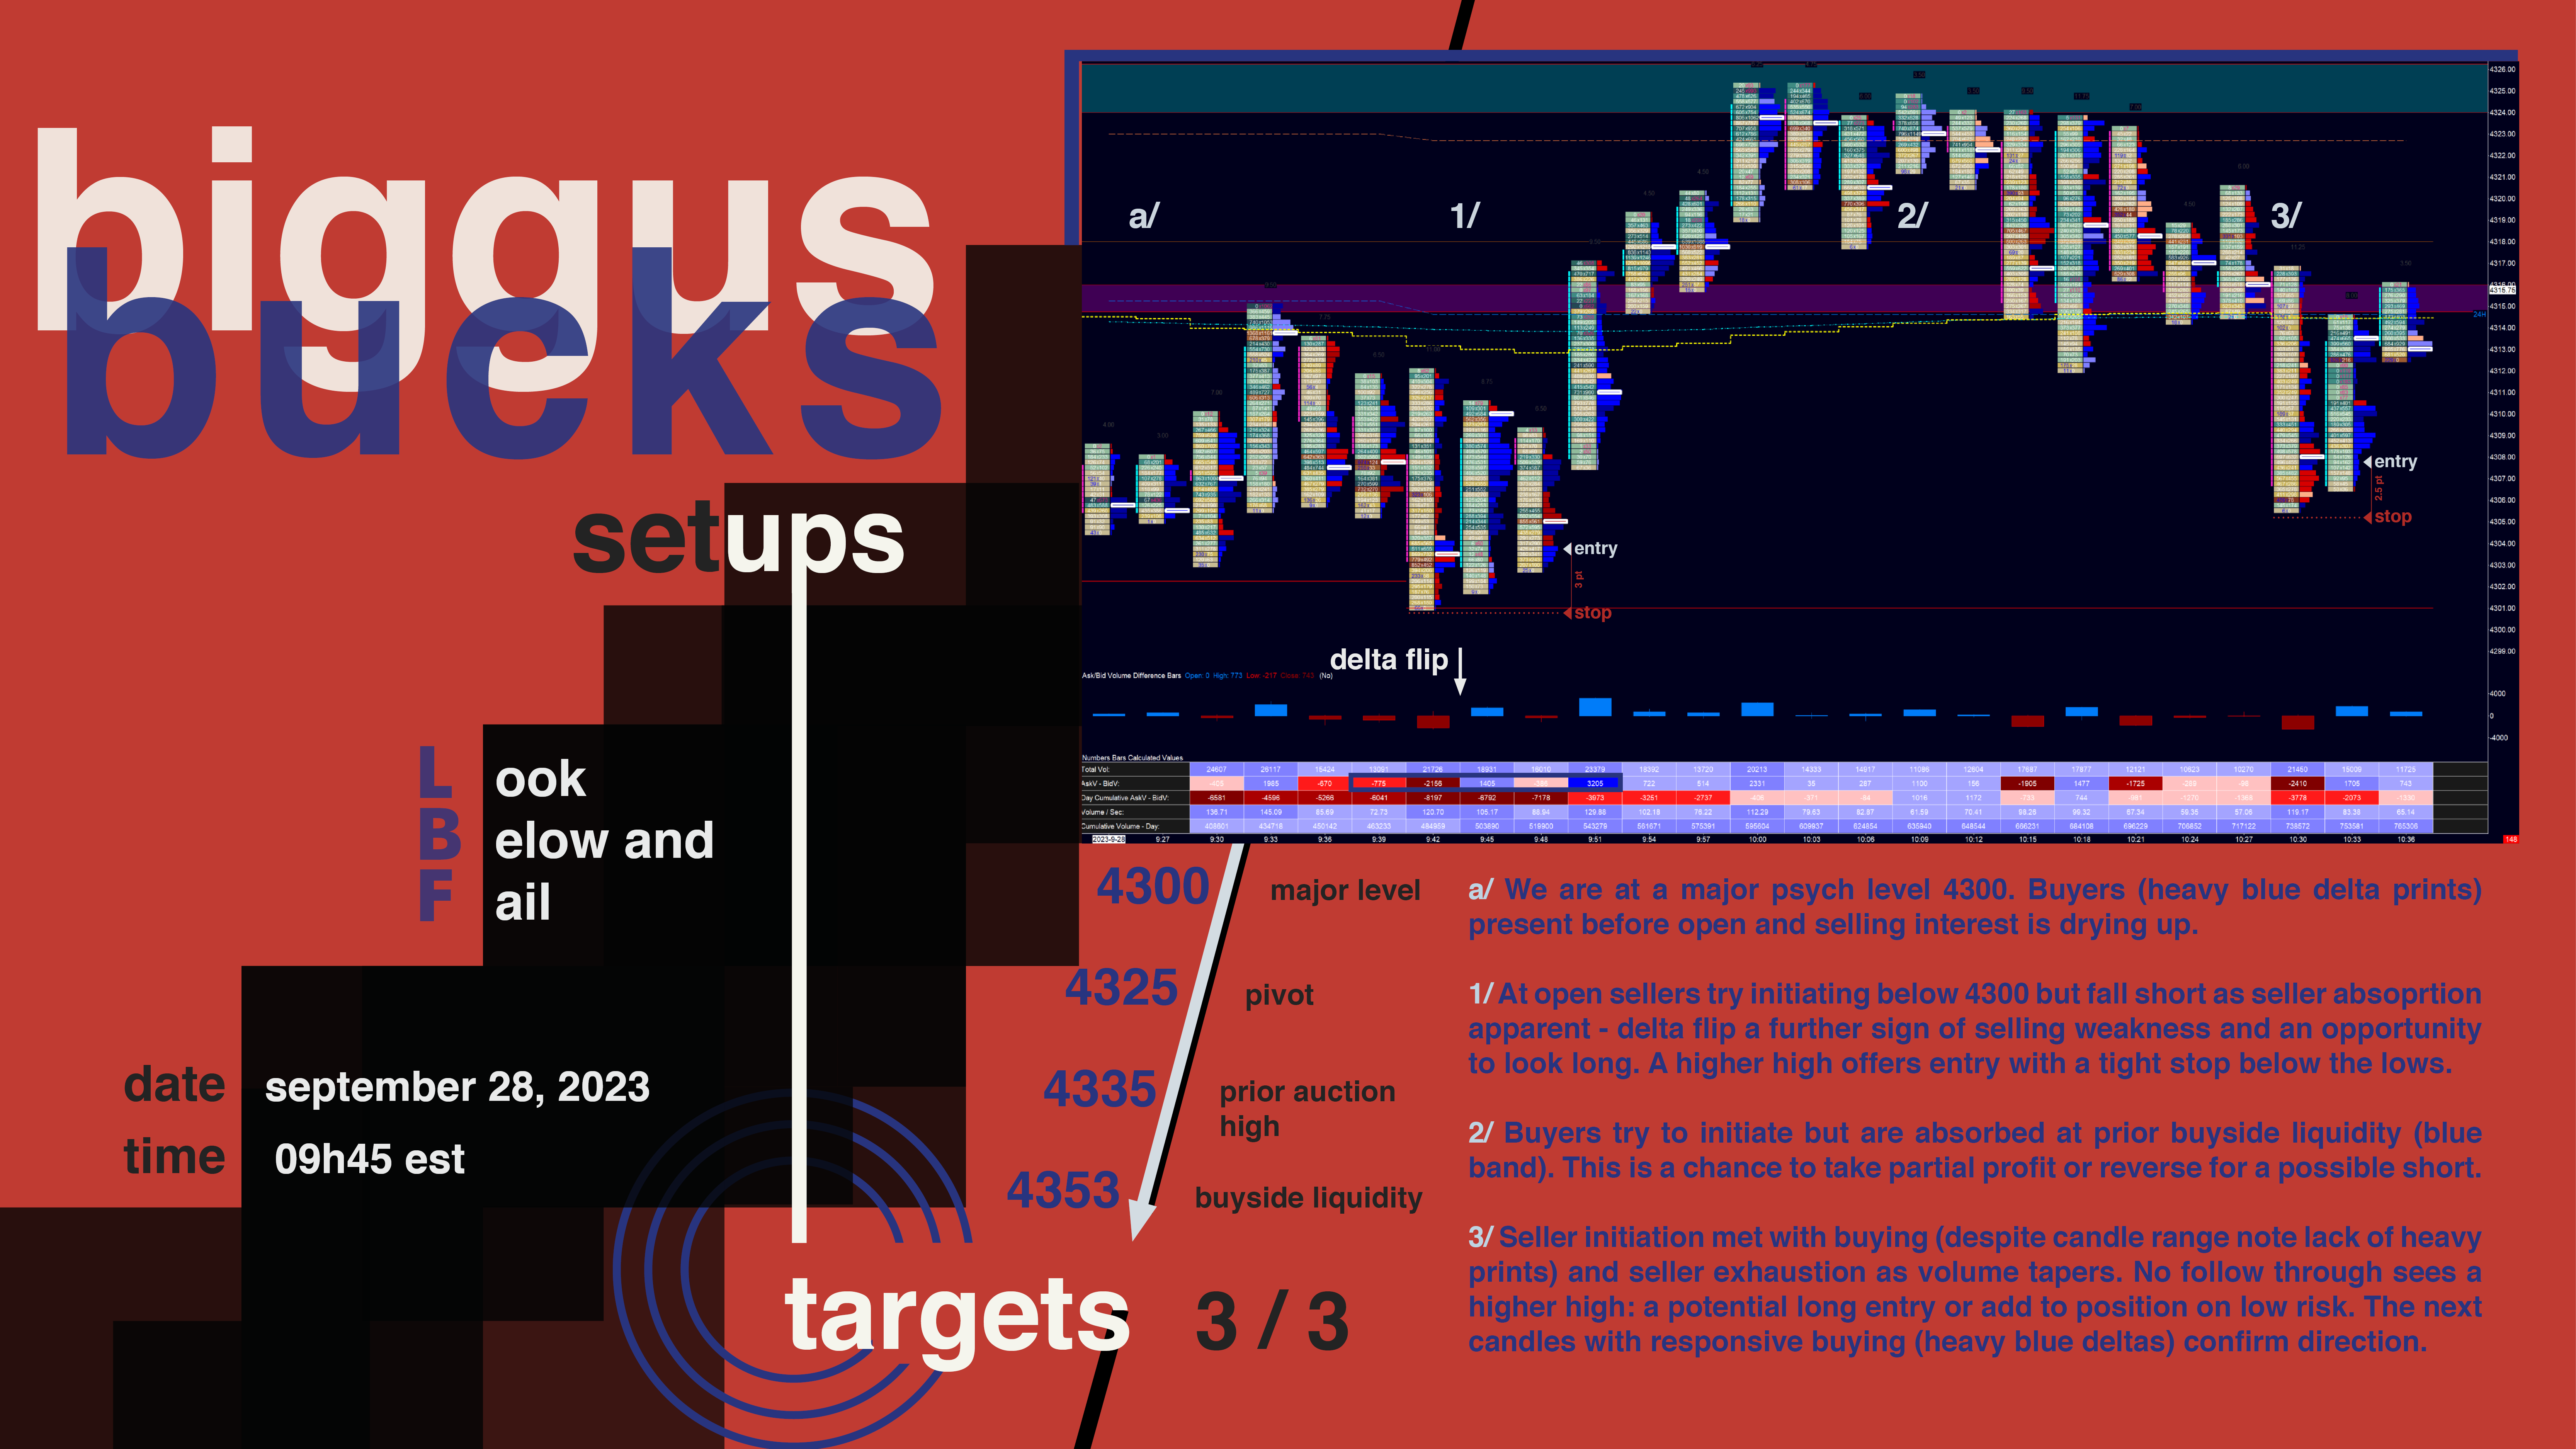
This trade offered an excellent retest opportunity of the opening range, shown above. This would be ideal for the more conservative trade. Risk in that case would be relatively low even with a stop below the opening range low, as long as the trader is disciplined with trade exits. The retest, while a more conservative entry, would have allowed for a nearly 45 point trade.
II. Look Above and Fail, September 29
The following day saw the opposite reaction in what was the upper band of a longer timeframe two-way auction. Buying was waning ahead of open after two strong data releases - lower than expected inflation prints in Europe and the US - after initially driving prices higher on little overnight resistance. Another important data point, consumer sentiment, was due half an hour after open. This also stopped momentum as the market held in limbo.
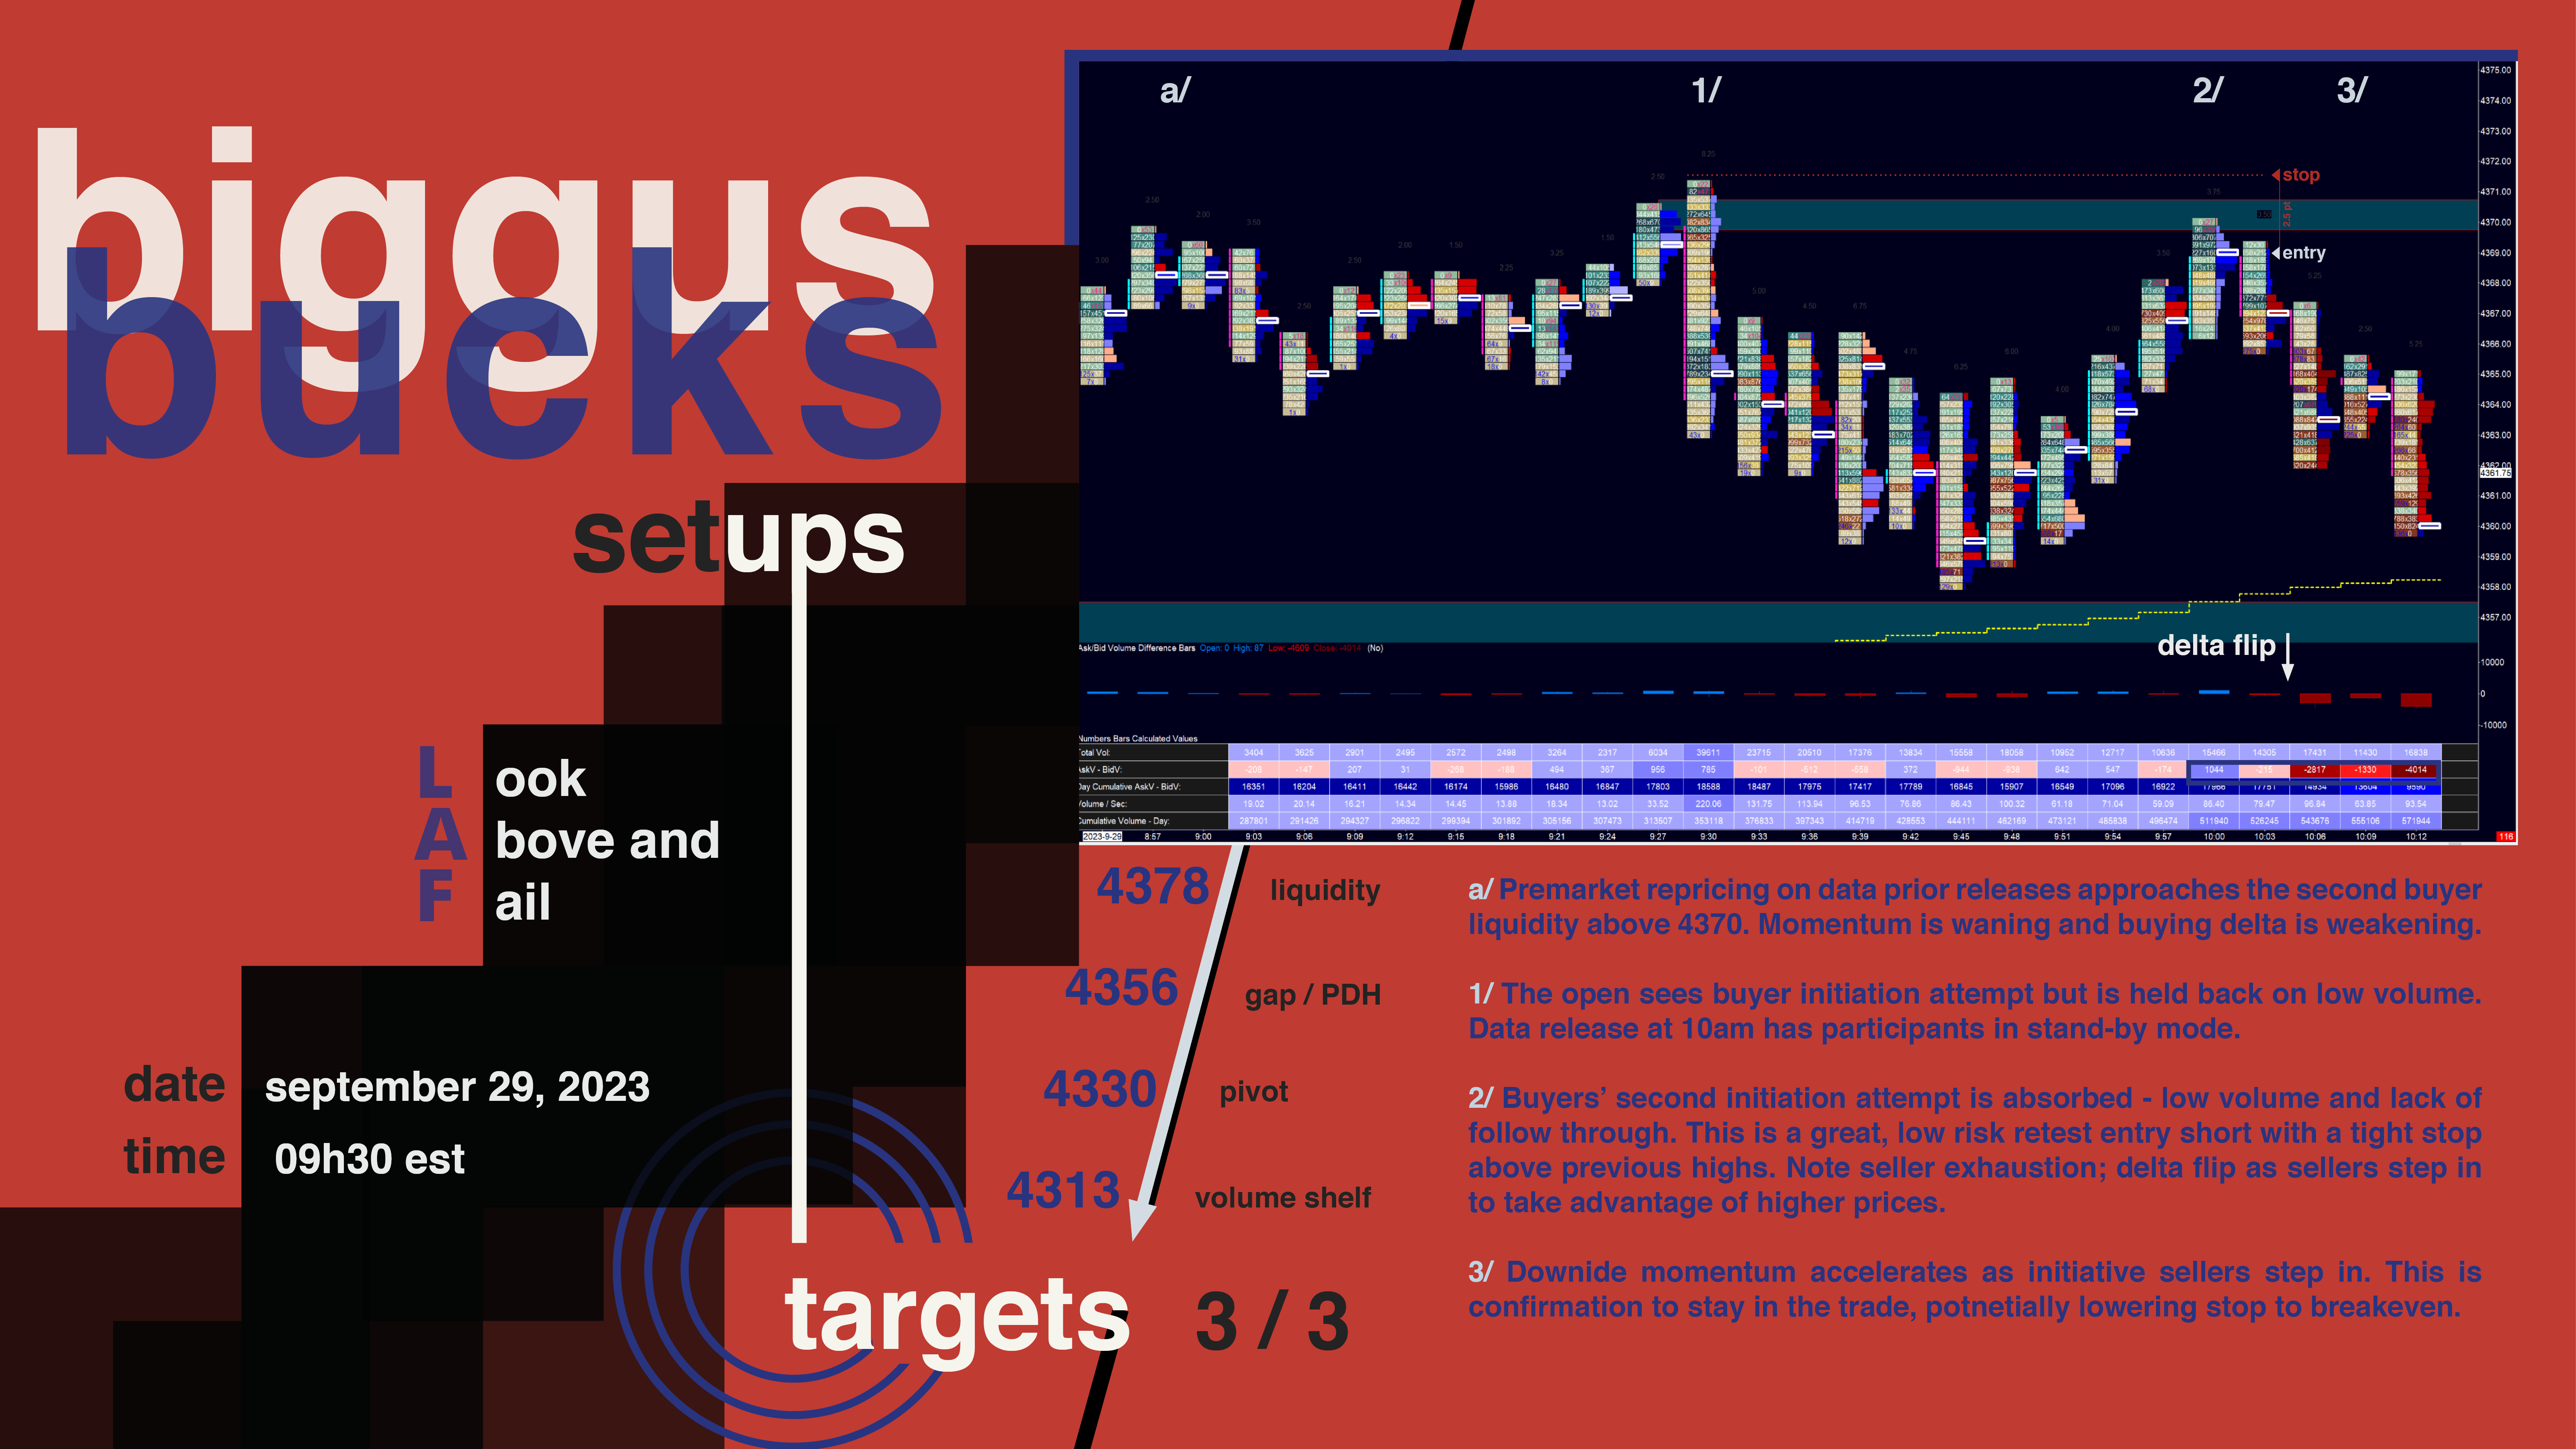
The retest of the opening range high was an excellent entry, and indeed preferable as it was after the data release. It is best to sit out volatility to avoid having to take on more risk. Note the buyside liquidity (blue bands), or areas of previously trapped buyers unloading positions, acting as support and then later resistance.
This trade held to a full conclusion offered nearly 55 points. Indeed a near full reversal of the prior day, but profitable for the astute trader in both directions!
Closing Notes
Like many things in life and trading, we are not inventing anything new. These are variations building on existing themes and concepts, adapted to my methodology. I refined this toolkit of setups over time to work for me - I encourage you to likewise adapt them according to your systems and needs. If you are in the process of developing them, I hope you can glean useful information from this primer.
I will be sharing more examples regularly, so stay tuned. In the meantime there are many resources online for these and other setups to help with your trading. Thanks for reading, and remember, capital preservation and risk management are key to your success!
Can TradingView show footprint?